
First introduced to Australia in the 1960s and 70s, PVC (Polyvinyl Chloride) soon became the Aussie plumber’s best mate for installing low pressure PVC fittings.
By the 1990s, PVC was the go-to product at your local wholesale plumbing suppliers for 100mm and 150mm pipe. Ideal for transporting hot and cold potable water, and for low-pressure DWV (Drain, Waste and Vent) systems.
Working with PVC pipes does take know-how, though!
In this article: we’ll give you all the low-down you need to know. Plus, those handy tips and tricks for installing low pressure PVC fittings.
Check out our DVW Master range of low pressure PVC fittings – from couplings and M&F bends to junctions and socket reducers.
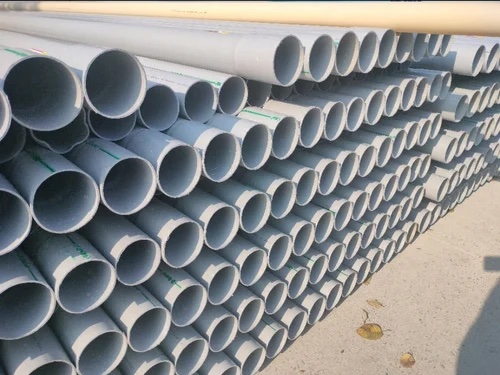
What colour and size is a low pressure PVC pipe?
PVC is a low cost, lightweight, durable, and highly versatile material. PVC pipes and fittings can hande all types of plumbing jobs – inside and outside the house.
It means wholesale plumbing products come in a range of different sizes, colours, and types of fittings and connections.
You need to know you have the right pipe for carrying out a low pressure installation, and NOT a high pressure pipe or fitting for pool pumps or irrigation.
Handy Tip! When buying from trade plumbing suppliers the first two most
important things to remember, are:
- DWV PVC pipe is usually coloured white and has thinner walls. This is because it’s only to be used for transporting ‘Drain, Waste, and Vent’ cold water or liquids.
- PVC pipe is not the same as a CPVC pipe*, which is usually beige-coloured, and has thicker walls.
*What is CPVC Pipe?
A CVPC pipe is a higher grade version of PVC that’s capable of withstanding higher temperatures (up to 92C) and transporting water at high pressure. It’s also approved for potable water use.
Handy Tip!
- Interior diameter of a CPVC pipe is measured by:
NPS (nominal pipe size)
and
- Exterior diameter by:
CTS (copper tubing size) reference systems.
Compared to PVC diameter sizes which are determined by NPS, only.
Find out more about sizes of DWV PVC pipes including Schedule 40 pipes

How to join your PVC pipe or fittings together
Joining PVC pipes and fittings together is actually not carried out by an adhesive – but by a “solvent weld”.
The reason is:
- Adhesive simply fills the space between the surface of the two pipes or fittings (like a bridge). It’s a chemical substance that sticks to both surfaces separately before it sets hard.
This means the join between the two pipes or fittings – which actually keeps them together – is only as strong as the adhesive itself.
Clearly, this is a high-risk approach. The long-term safety of the join is entirely dependent on the integrity and durability of the adhesive.
The correct method of joining PVC pipes or fittings is by a solvent weld.
What’s a solvent weld and how does it work?
As with joining metal pipes or fittings, the two items are welded together. The actual pipes or fittings are directly joined together by the material they are made from – the PVC.
The weld involves a 3 part process:
Part 1 To prepare the surfaces, a solvent primer is applied to both PVC pipes before joining together. This not only cleans and degreases the surface it also removes the PVC glazing. Primer is essential to enable the solvent cement to be absorbed into the wall of the pipe or fitting.
Part 2 A solvent cement is then applied which softens / melts the two surfaces for ‘mixing’ together.
Part 3 The two PVC parts are held together under pressure. The two surfaces merge and bind or “weld” together to form a single pipe, which is actually stronger than a solid pipe.
Compared to an adhesive join, the strength of the welded bond relies instead on the strength of the actual materials NOT on the adhesive.
Handy Tip!
Solvent cements are made to be specifically used with its own type of PVC plastic. Each type is colour-coded for individual application. Solvent cements designed for one type of pipe may not work well with a different type.
The Australian coding system for solvent cements and primer
Solvent cements
- BLUE (Type N) – non-pressure PVC applications, specifically DWV pipe systems.
- GREEN (Type P) – pressure PVC applications, including potable water installations.
Solvent primer
- PINK – Primer suitable for use with Type N and Type P solvent cements.
Installing low pressure pipe or fittings – tips for getting it right

Cutting the pipe
When cutting pipes to the correct length, you should always do this BY HAND, using a fine-toothed hacksaw, ideally firmly clamped into a mitre box. A dedicated PVC pipe cutter may also be used.
- NEVER use power tools, such as a jigsaw. Why? Because the rapid moving blade will melt the PVC.
Handy Tip!
To ensure a full interface fit, allow a good 12-13 mm (around a half inch) for the pipe joining area.
- Double check the pipe is cut straight and square to ensure a good fit.
Handy Tip!
DO NOT cut the pipes at an angle, which causes stress at the join.

Final preparation before joining pipes
Carefully remove burrs from both the inside and outside edge of the pipes with a utility knife/deburring tool.
- DO NOT cut a large chamfer around the pipe edge which will trap an excess of solvent cement.
IMPORTANT: Proper deburring of the pipe end will avoid wiping cement from the inside of the pipe when inserting to form the joint. Failure to properly deburr may result in inadequate pipe penetration and solvent cement accumulating at the pipe end.
Next, check for damage, and carefully wipe away any dirt/dust.
Finally, test run the pipe connection by, “dry-fitting” the joint to ensure a correct fit.
Handy Tip!
When dry fitting the two connections, exactly mark where the joins meet with a permanent marker. This will help you line them up once the solvent cement has been applied.
Next…
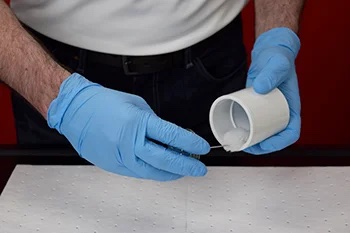
How to apply the solvent primer
Using a natural fibre brush – apply the solvent primer to:
- Outer surface end of the smaller size pipe.
and
- Inner surface end of the second larger pipe or fitting.
Handy Tip!
Wait for around 10-15 seconds to allow the primer to take effect.
How to apply the solvent cement
FIRST – Apply a thin, even coat of solvent cement to the inner surface of the larger pipe of the fitting.
This is to prevent the solvent evaporating faster from the exposed outer surface of the smaller pipe.
CHECK! Ensure excess solvent cement does not build up at the rear end of the inner pipe surface as this will continue to melt and soften the PVC, and weaken the pipe.

NEXT – apply a similar even coat of solvent cement to the outer surface of the smaller pipe or fitting. Ensure there are no uncoated areas, and only apply up to the line marked out when dry fitting.
Handy Tip!
Always use a brush that’s large enough to apply the solvent to the join, and up to 30 seconds, MAX!
As a rough guide, the brush width should be around one third of the pipe diameter.
Connecting the pipes or fitting
Immediately and quickly connect the one pipe to the other or to the fitting in a single movement, without stopping. This is because the bond will have already started to set.
Handy Tip!
To help even the solvent cement while connecting, try gently twisting one pipe end as you insert, rotating about a quarter turn.
After pipe join is made
Once joint is completed, leave for five minutes to cure do not use with water for at least one hour
The time curing takes will depend on air temperature and humidity.
Joints cure faster when humidity is low, and temperature is high. The higher the temperature, the faster joints will cure.
In a nutshell …
You may be simply looking for low pressure PVC pipes and fittings for DWV but you still need to get it right! Or risk a nasty waste water leak impacting exterior wall surfaces, ground or soil.
This means:
- Selecting the right colour coded PVC pipes indicating the right internal / external diameter.
- Buying the correct solvent primer and solvent cement NOT an adhesive.
- Using hand tools NOT power tools.
- Carefully preparing, marking out and cleaning the pipe connections.
- Testing and dry-fitting first.
- Properly applying the primer and solvent cement.
- Allowing enough time for join to cure and set hard.
FAQs
Q: What happens if I make mistake when joining together PVC low pressure pipes?
A: If the connections don’t seat correctly, you must stop. Don’t force into place or try to separate and re-do. Discard the parts and start again with clean new pipe / fittings.
Q: What are the Australian standards for low pressure PVC DWV pipe fittings?
A: AS/NZS 1260: PVC-U pipes and fittings for drain, waste and vent application.
Q: Can DWV pipe be installed in sunlight?
A: Yes, DWV pipes and fittings contain UV absorber and can be installed in direct sunlight.
Q: What is the lifespan of solvent cement?
A: Solvent cement should be used within 12 MONTHs of the date stamp. It should not be used if solvent cement has become so thick it no longer flows easily.

Need advice on which low pressure PVC DWV pipes or fittings you need for your job?